Monthly Archives: September 2019

How to change Instagram Username?

Whether you regret your teenage-fueled weird Instagram username or your cool startup pivoted and changed its name completely (warranting a new Instagram username of course – that’s until your next pivot comes along) then here are a few super simple steps to change your Instagram Username, the one which people partly use to find you and the one which they need to use to tag you in.

Here are the steps (identical for phones and web browsers)

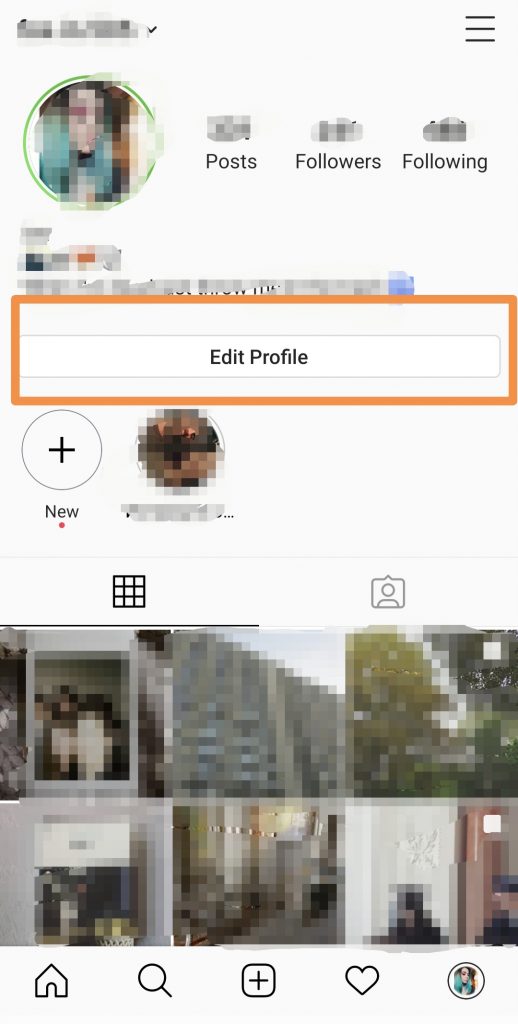
  1. Go to Instagram’s main page or to the application, click on your profile (bottom right corner in the app and in the top right on the web).
  2. After clicking here, click further on “Edit Profile” which will be next to your display picture. If you scroll down a bit the page will look like this. The top part should start with “Edit Profile” and this is the tab you need to be in.
  3. Here you can change your display picture, name, username and so on! Whatever your heart desires to change about your account is now there – unless someone else has the same username, then you can’t really do much unless you really really want it.  We’ll show you how to do that in another post.

Here is a visual guide that you can follow along with the written description above.

The edit profile option will take you to a page where you can modify most of your displayed personal information. Click on the username to change it.

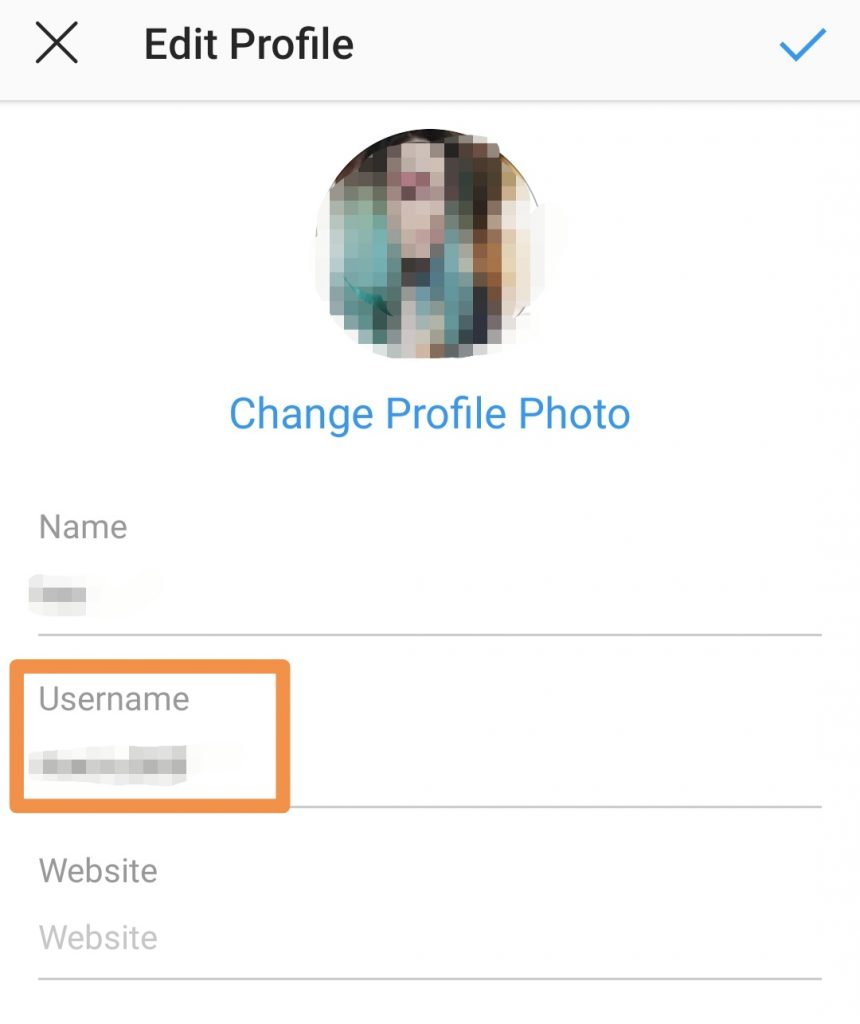
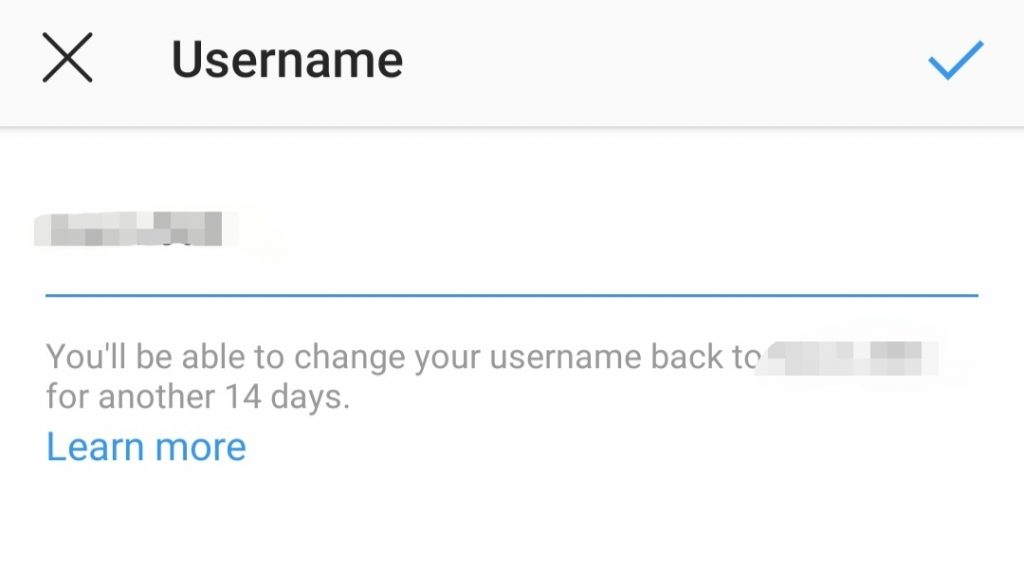
You are now in the section where you can edit your username. If you choose a username that is already taken, the app will say it is unavailable. Eventually, when there is a unique username that you can pick, it will not display any messages. You can now verify it with the checkmark button above.

How to edit Instagram bio?

  1. Open your profile, and click the “Edit Profile” button
  2. Click on your bio to edit
  3. Update your bio by adding any profile usernames (using “@”) or hashtags (using “#”)
  4. Click “Done”

It’s as easy as that! Now your username mentions and hashtags will be clickable links within your Instagram bio.

Generally speaking, it’s a great thing to have your username linked on someone else’s bio, because it adds more visibility to your account and allows their followers to discover you. This is simply a security measure to keep accounts from abusing the new feature.

How to Add a Link to Your Instagram Bio

  1. Open your Instagram mobile app.
  2. Visit your profile by tapping the person icon on the bottom right.
  3. Tap “Edit Profile” at the top of the screen.
  4. Write a custom description in 150 characters or less.
  5. Add a brief link to your website in the form of yourdomain.com.
  6. Add links to other profiles by tapping “@” followed by the profile’s handle.
  7. Add hashtags by tapping “#” followed by the hashtag you associate with.
  8. Tap “Done” to save your bio.

How to Create a Location on Instagram

Instagram used to allow you to create a custom location, but it has since changed. Custom locations can no longer be created directly on Instagram, rather they must be created through Facebook.

It is unlikely that you will need to create a location on Instagram, as most of the data on the app is taken from Google and Facebook. Most users will not run into this issue if they already have a Facebook business page or a Google My Business page. However, if you need to create a location on Instagram, you must first log onto Facebook to create a location on Facebook and that location will show up on your Instagram account.

How to Search Instagram by Location

One of the benefits of adding or tagging a location on Instagram is that users can search Instagram by location. This is commonly done when a user is looking for a restaurant or event to attend or when they stumble upon a picture taken at a location and want to see more.  When using Instagram for your business, always add the location of your business so that your pictures will come up in a location search.

To search a location on Instagram from the search icon:

  1. Tap the Search icon.
  2. Tap Search.
  3. Tap Places.
  4. Enter location name (this is usually the name of the business).

To search a location on Instagram from a photo:

  1. Tap the Location.
  2. All of the photos tagged at the location will come up.
  3. Search through the pictures.

In addition to using the Instagram app to search locations, you can always search locations on websites or apps like Gramfeed that allow you to search locations based on a map or address.

Why Tagging Your Location is Important

Every small business owner wants to put their business on the map to get found by more customers. Getting your small business on Instagram and immediately adding your business’s location is a great way to get your business in front of people who are active on the social media site—not just any people, but people who are most likely to become customers.

Instagram users add and search locations for a variety of different reasons. Whether they’re daydreaming about a vacation, looking to learn more about a city, or searching for tasty dishes at your restaurant, locations on Instagram give users the ability to tell their followers where they are. Here’s a quick rundown on how to tag a location on Instagram, how to search for a location on Instagram, and how to hashtag a location on Instagram.

How to Tag a Location on Instagram

A location tag, also known as a GeoTag, on Instagram puts a place on a literal map. Location tags tell your followers where you are or where the picture was taken.

If you have a brick and mortar location like a store, office, restaurant, salon, or studio, tagging is a great way to literally put your business on the map on Instagram. A location tag provides your physical address and location on a map so that customers can find your business. Always use tags when posting from your Instagram account, even for an Instagram contest—you never know where your next customer will be!

To tag a location on Instagram:

  1. Tap “Add Location”
  2. Search for your location.
  3. Select it and post the photo.

How do I check my Instagram activity results?

Checking your results on Instagram is important to optimizing your performance. Up until recently, Instagram didn’t give any statistics about your posts and account except for the number of likes, replies, and mentions of your profile.

However, this has changed with the introduction of the Instagram Business Account (very similar to Facebook Business) which gives you access to Instagram Insights. It, however, has some limitations. For example, you get the data for the last seven days only. Not long, right? It’s impossible to conduct a thorough analysis on such a short timeframe. Also, when your Stories disappear, you lost their data. To understand your performance on Instagram, you need something extra, some external tool. Like Sotrender.

How to delete comments on Instagram?

Sometimes you post a comment and then realize that something’s wrong with it. Misspelling a word, tagging the wrong person, or even posting it on the wrong post. And sometimes you want to delete a rude comment that someone left under your photo. Thankfully, Instagram lets you delete comments, even if it’s not so obvious how to do it ar first.

But it’s really easy – you just need to complete the following steps:

  • First – Tap the ‘Comment’ button under the photo to see all comments.
  • Touch the comment that you want to delete and swipe left until the trashcan icon appears on the screen.
  • Tap on the trashcan icon and then click ‘Delete’.
  • Re-write your comment so that it’s how you intended.

How can I delete my Instagram photos?

Sometimes you post a picture on Instagram and after several minutes (days, or even years!) you change your mind and want to delete it. Thankfully, Instagram makes this easy to do.

  1. Go to Instagram on your smartphone.
  2. Click your profile button at the bottom of the screen.
  3. Review your photos and tap the one you want to delete.
  4. Tap the options icon (three dots in the right-hand corner of the screen).
  5. Tap ‘Delete’.
  6. Confirm the deletion.

You can do this with as many pictures as you want but it’s still not possible to delete more than one post at the same time.